Friday, December 19, 2014

Wednesday Post #12: A New Book Structure, the Cube Book

Today's post is all about a lesson: never throw anything away. I made the parts of today's artist's book several years ago after taking a workshop from Laura Wait. In the workshop we painted large sheets of textwove paper with paste paints then folded, cut and bound books using the Drum Leaf binding, invented by Tim Ely. I loved the class and the surprise nature of how images, cut and rearranged, could look different once the final book was assembled. We learned how to write text in several interesting ways and to use this as imagery not words. I took the class to learn the Drum Leaf binding, but really enjoyed the embellishment aspects more.

Fast forward to my painted 24 by 18 sheet of textwove that I decided to cut and fold into a form I learned way back in 2005 from Karen Thomas. I have adapted her technique to folding one long strip of paper into a 4 page accordion book. I made the paneled long strip you see below in triplicate and then put it away in my bottom drawer and there it languished until a few weeks ago. I was looking through my origami models to see what I wanted to take to the origami group meeting and I found the painted, folded strips of paper and decided to rework the pieces. I kept one long strip and cut the others into squares, refolded them and inserted them into the available openings. I created a triangular tab to hold it all closed and realized that I could make the book cube shaped by flexing some of the folds. Voila! a new book was created from the cast-offs of an almost forgotten project. So, always keep interesting pieces of paper and paw through them once in a while and see if you can't come up with something new and different to do with them.

I hope you enjoy the results of my paper play.


Here is the book closed and in cube form.


This is what the book looks like open.


Looking straight down into the closed book.


Here is the book showing its parts. The four twist folded inserts at the top and the long paneled strip below. Notice the way the folds look when you make this book from a long strip of paper.


The back of the book showing the paste colors.


Folding directions for one panel of the accordion book.


Crease pattern for the twist insert "pages."


Wednesday, December 10, 2014

Wednesday Post #11: The Paper Folding Holidays

Today's post is all about paper holiday decorations and our special Doctor Who Christmas Tree. As you will see in the photos below, we have to make our own snow in San Diego. We also like to deck our tree with weeping angels, nightingales, sparrows, and a few paper ornaments to celebrate the season and our love for all things DW. Enjoy the pictures and as always comments are most welcome.

-Gina

Doctor Who Tree with german bells, cranes and folded boxes (in addition to the weeping angels, of course).


Traditional paper snowflakes on our windows to make 70 degree weather feel like winter.

Sunday, December 7, 2014

San Diego Origami Group

I went to Solana Beach Library yesterday to a meeting of the San Diego Origami Group. I had a wonderful time meeting all the other members who attended. I even met a former San Diego Book Arts member and reconnected. If you are interested in origami, learning to fold new models, or just want to meet a nice group of people; I encourage you to check out this group.

Here are some of the models we folded in our two hours together:


John and Kathy showed us how to fold this star.


Marti shared this cute stocking that can hold a mini candy cane.


John taught me how to make this hexagon bowl. Thanks.


I shared the German Bell.

Saturday, December 6, 2014

Wednesday Post # 10: The Little Prince altered book

I have been working on altering some classic children's books this week. I have an idea for Alice's Adventures in Wonderland, by Lewis Carroll, but am letting it stew for now. In the meantime, I have been drawing, measuring, and cutting into a student copy of Le Petit Prince, by Antoine de Saint-Exupery. I wanted to make it look like there was a staircase leading the prince from his asteroid home down to Earth. There are things I would do differently if I did it again, but all in all I am happy with the results. Let me know what you think and come back soon to see how I transform Alice...


The book before I started to cut.


I wanted the stairs to spiral, so I drew one using the Fibonacci sequence. It works well, if you need a quick, accurate spiral.


I also wanted the stairs to be evenly spaced and radiate out from a center point. To do this I divided a circle into 1/6ths and subdivided this twice more to create the above drawing. I made all the drawings on tracing paper so I could overlay the designs for the final one below.


Here is the piece of tracing paper I used to make the cuts in the book. I first traced the outline of the boy and asteroid that I wanted to keep, then I added the spiral and the radiating lines from the drawings above.


This picture illustrates how I cut each section of the stairs starting at the back of the book and cutting larger wedges as I went.


Here are the tools of the trade that I used during the process: a thin cutting mat, two exacto knives (one for straight lines and one for curves), a 1/4" spacer for the page edges, and a pencil to trace the lines from the tracing paper onto the book pages.


Voila!! 

Thursday, September 18, 2014

I spent a hot weekend here in San Diego trying to figure out how to fold an expandable file book based on Hedi Kyle's Blizzard Fold. It took some trial and error to get things just right. I think in the end I had to make 5 or 6 models to get a book that would hold ATC size inserts (3.5 x 2.5 inch cards). The book can be modified to make it taller, squarer, wider, etc. depending on the size of the piece of paper you begin with and how much you fold in the long edges.

Below is a series of pictures I took while folding the 3.75 x 2.5 inch model for my ATC's. Enjoy and please feel free to leave comments. I like to hear from you.

~Gina


1. Cut paper to 7.5 x 20 inches. Fold both long edges in 1/4 of the width (1 7/8 inch). I used a long clear ruler to score and fold these lines since the paper is grained short (the grain of the paper is parallel to the 7.5 inch width of the paper). Once both edges of the paper are folded unfold them in preparation for step 2.


2. Accordion fold the paper into 8 equal sections. The best way to fold paper is to fold it in half, unfold, fold the two edges into the center fold, unfold and finally fold each of these 4 sections in half. Do them one at the time and do not stack the folds as this leads to the paper twisting. Only fold one layer at a time for best results.
 

3. Fold up all of the accordion folds. Your paper should look like this. The first page should open away from you.


4. This step is where we diverge from the normal Hedi Kyle Blizzard Fold. Follow the steps in the handwritten directions above numbered 1-3. Hopefully, the pictures and lines make sense. When you are done your model should look like the picture above.


5. Open the page and this is how the model looks. 


6. Now we need to fold the next section the same way as above, but with two sides. This time we have a bit of help from the previous fold. The angle of the triangle is established by the crease made in the last step. This will help you line up the diagonal that meets in the center of the folded page. 


7. This picture shows you what the model looks like once both top and bottom triangles have been folded on one side.


8. Here is the model with both sides folded down and in.


9. Open the next page and repeat the process two more times.


10. Here is the last page ready to have its triangle flaps folded.


11. This is what the back page looks like with the triangle flaps folded in. Notice the overall shape of the model now.


12. This is the top front view of the model.


13. Compare this picture to the one above. See how I have folded in the triangles that stuck out above?


14. Here is what the back side of the model looks like. I kind of like this look too. You could tuck item in here if they were flat enough. In the final book this side will get hidden, though.


15. This is the completed model from the side. The triangular pieces in between each accordion fold give this book its expandability. You can put bulky objects in each section. 


16. To finish the book simply attach a cover with narrow spine and you are ready to go. The cover for this size book measures 4 x 5.5 inches.  I attached it with glue and double sided tape, but you can use whatever you like.

Tuesday, July 29, 2014

Wednesday Post #8: Circle Segment Sculpture

I have been working for a few weeks on a project and taking pictures of the art in progress. I thought you might like to see how a piece of art goes from concept to completion. I took a series of pictures throughout the process and they appear below with descriptions. You will see that I changed directions along the way. I often begin a piece of art with one idea in mind and as I work other ideas surface and demand to be given a chance. I like the end result of this project and hope you do too. I still need to come up with a name so if you have any suggestions please leave them in the comments section. Thanks for stopping by.

~Gina

 The idea for this piece came from a segment I saw on Antiques Roadshow some time ago. This guy brought a round table in that was made of six curved parts. It turned out that each part had its own set of legs and could, therefore be deconstructed and rearranged into different configurations. I loved it instantly and drew a sketch to save for later. I made my circle and segments from foam core using a circle cutter to make the cuts.

 At first I planned to make this with a top and bottom piece suspended with wooden dowels. I made a couple of segments to try out the concept and played with different origami objects to place inside.


Here are some of the parts and tools I used at this stage to create the interior space. After I lined up the two segments I didn't like the open feeling of the piece, but wanted it to have thickness. I decided to undo this work but save the cut pieces. I ended up cutting out 3 circles and segmenting them to make the final circle form.

 This is a picture of the open space design with an origami butterfly suspended in the middle on a pin. I ended up changing the concept entirely.

Here is one segment wrapped in Japanese paper the meld the three pieces of foam core together. I ended up painting the sides the match the colors of the top. See the next few pictures.

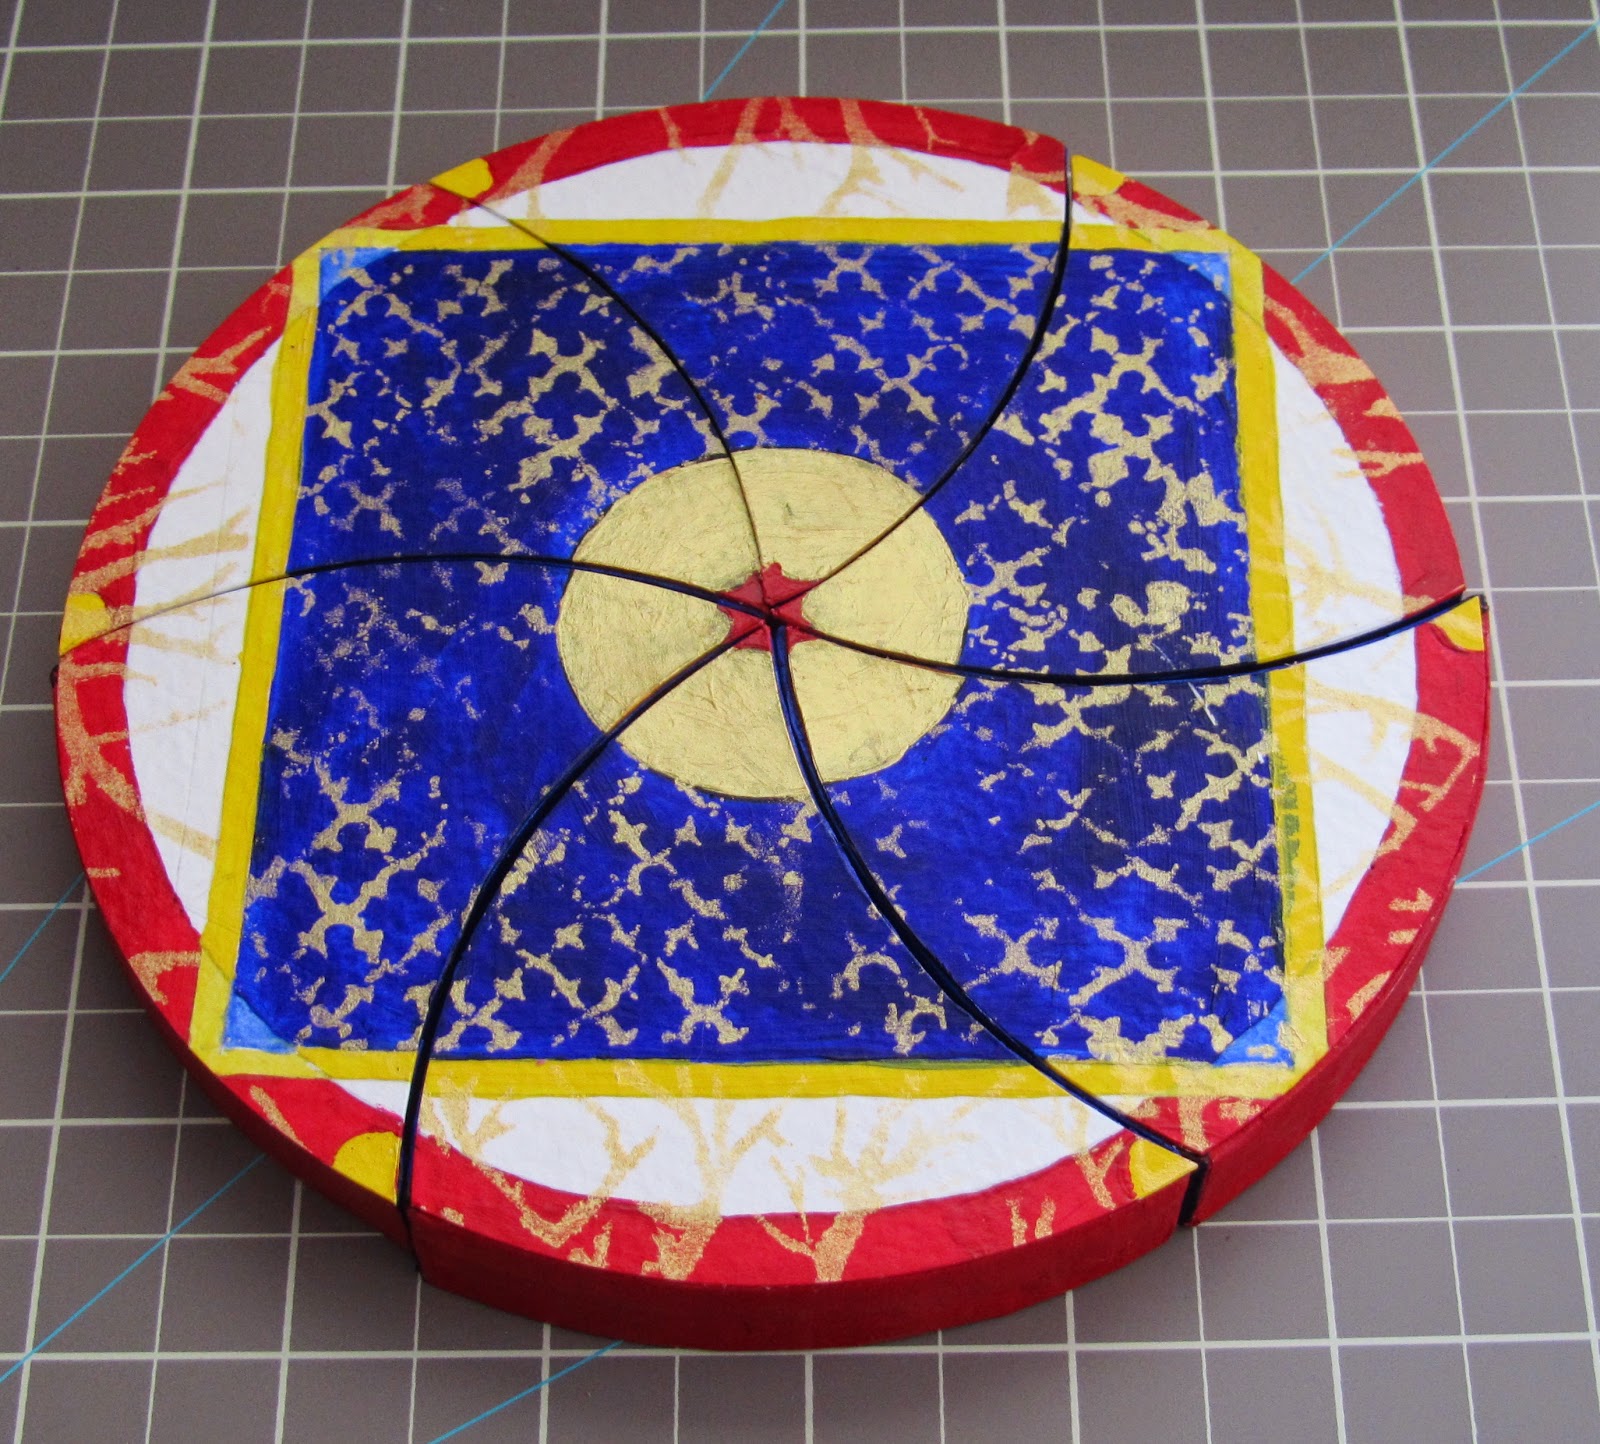
 This painting for the top of the circle started out as just a sample. I ended up liking it so much that I used it on the final work. I love the way the gold and blue work together. I used the circle stencil to mask the center, which was originally black, so that I could paint it gold to match the gold stencil work.

 My favorite configuration for these segments is the one shown above. before I glued the cut paper wedges to the foam core I played around with their arrangement once the circle design was broken up. I was surprised that the design worked so well after being broken apart and reformed.

When I was satisfied with the look of the design, I glued the watercolor paper design onto the six segments being careful to align each piece with the edges of the foam core base.

Then I rearranged the segments into my favorite shape and turned the pieces over. 

I decided to use a piece of Japanese paper (the same kind I used for the sides of each segment) with writing on it for the back. I laid a sheet of paper beneath this shape and traced each segment in pencil. Then I used a divider with pencil lead to trace a 1/8th inch indent. I cut out the paper and glued it down.


This is how the back looks when the piece is returned to its circle form. I still prefer the shape above, but this looks good too. What do you think?