Wednesday, June 4, 2014

Wednesday Post #7: My Mini Album Structure

It has been a while since my last post. Somehow I missed May altogether. I will work on posting more regularly now that summer is almost here. Today I have pictures of my latest creation, a mini album. I invented the page structure and sewed the spine so that the pages lay flat when open. I used Graphic 45 Bird Song 8 x 8 papers to decorate the pages and I used Japanese handmade paper and black book cloth for the covers. The best thing about the page structure is that the folding process creates pockets and corner tabs as you will see in the pictures. It also creates a between-the-page pocket for a large photo mat. I folded the pages two ways to get side and top pockets, but you could make them all the same way. I will post a tutorial for making the pages on You Tube as soon as my editor (son) has some free time to do his technical magic. In the meantime, enjoy the pictures and descriptions below.

Thanks for visiting.

Gina

 Picture one shows the book with the pages sewn to the accordion folded grey paper.


Here are all of the pages laid out before they were decorated with G45 paper.


A side view of the pages and accordion fold binding.


Two page spread with side and top/bottom pockets.


Two page spread with corner tabs showing.


Good view of sewn accordion fold spine.


Finished book cover. I used Japanese paper for this along with black book cloth. The grey spine paper has a 3 inch end that I glued onto the book cover.


Inside page spread with G45 Bird Song papers decorating the pages. Notice the tabs at the top and sides of the pages. These are the photo mats.


Here is another two page spread showing floral patterns. I just love the florals in this set.


Here I have pulled out the photo mats so you can see that they match the pages and pull out from the top or the side depending on how I folded the pages.


Another two page spread showing off the greens from this collection.


Another page spread.


Here you can see that sometimes the pockets are both the same (in this case from the top of the book).


More photographs of the pages decorated. I love the way the papers work together.

This is a photograph of the binding sewn to make the book sturdy. I did sew the binding loosely so that when photographs are inserted they won't make the open end of the book bulge. I used scrap book board as spacers when I was sewing to keep the spacing between pages consistent.

Wednesday, April 16, 2014

Wednesday Post #6:Teaching the Modified Blizzard Fold at SDBA

Good day and welcome to my sixth post on Wednesday. Today I would like to share some pictures from a recent workshop I taught. It was lots of fun teaching a group of San Diego Book Arts members how to make a Hedi Kyle Blizzard Fold book. We then changed some of the folds to make a box structure that I developed several years ago. I call it the Modified Blizzard Fold. I have since discovered another modification that you are welcome to try as well. One of these days I will make a video of the folding process so stay tuned for that.

Please check out the pictures Joan Crone took of the group as we folded our books. It was a pleasure to teach and learn from everyone. Enjoy!

~Gina

 Here are some of the supplies we used to color and decorate our paper before folding.

 Yvonne is folding in the foreground while I sit back and explain the next fold.

 Sara and Sibyl are busy popping open their boxes.

 Britta inspects her work.

 Sara makes a box.

 Showing Pam how to get the box to "pop."

 Helping Kathy get the box to close properly.

 Pam and Sari look at the interaction of structure and design.

 Sibyl inspects her work.

Sara with her model fully open.

Wednesday, April 9, 2014

Wednesday Post #5: Topographic Altered Artist Books

Welcome to a new month and a new post. Today I would like to share some pictures of my topographic books. I have been a book artist for about 13 years and recently I started making sculptural books based on topographic maps. I "carve" the books page by page to leave a landscape behind. Sometimes hidden lines and text come out and make the pieces more than what I intented them to be. Several of these books have been juried into art galleries or university shows.

Enjoy!

~Gina


My first foray into topographic book arts was a Library Card Catalog traveling exhibit. I used the positive and negative pieces to make 2 complimentary books.


 Closeup of Mesa Tables.

Here is "Mesa Tables." I only carved the right side of the book of pipe tables into a mesa formation. Hence the name of the piece.

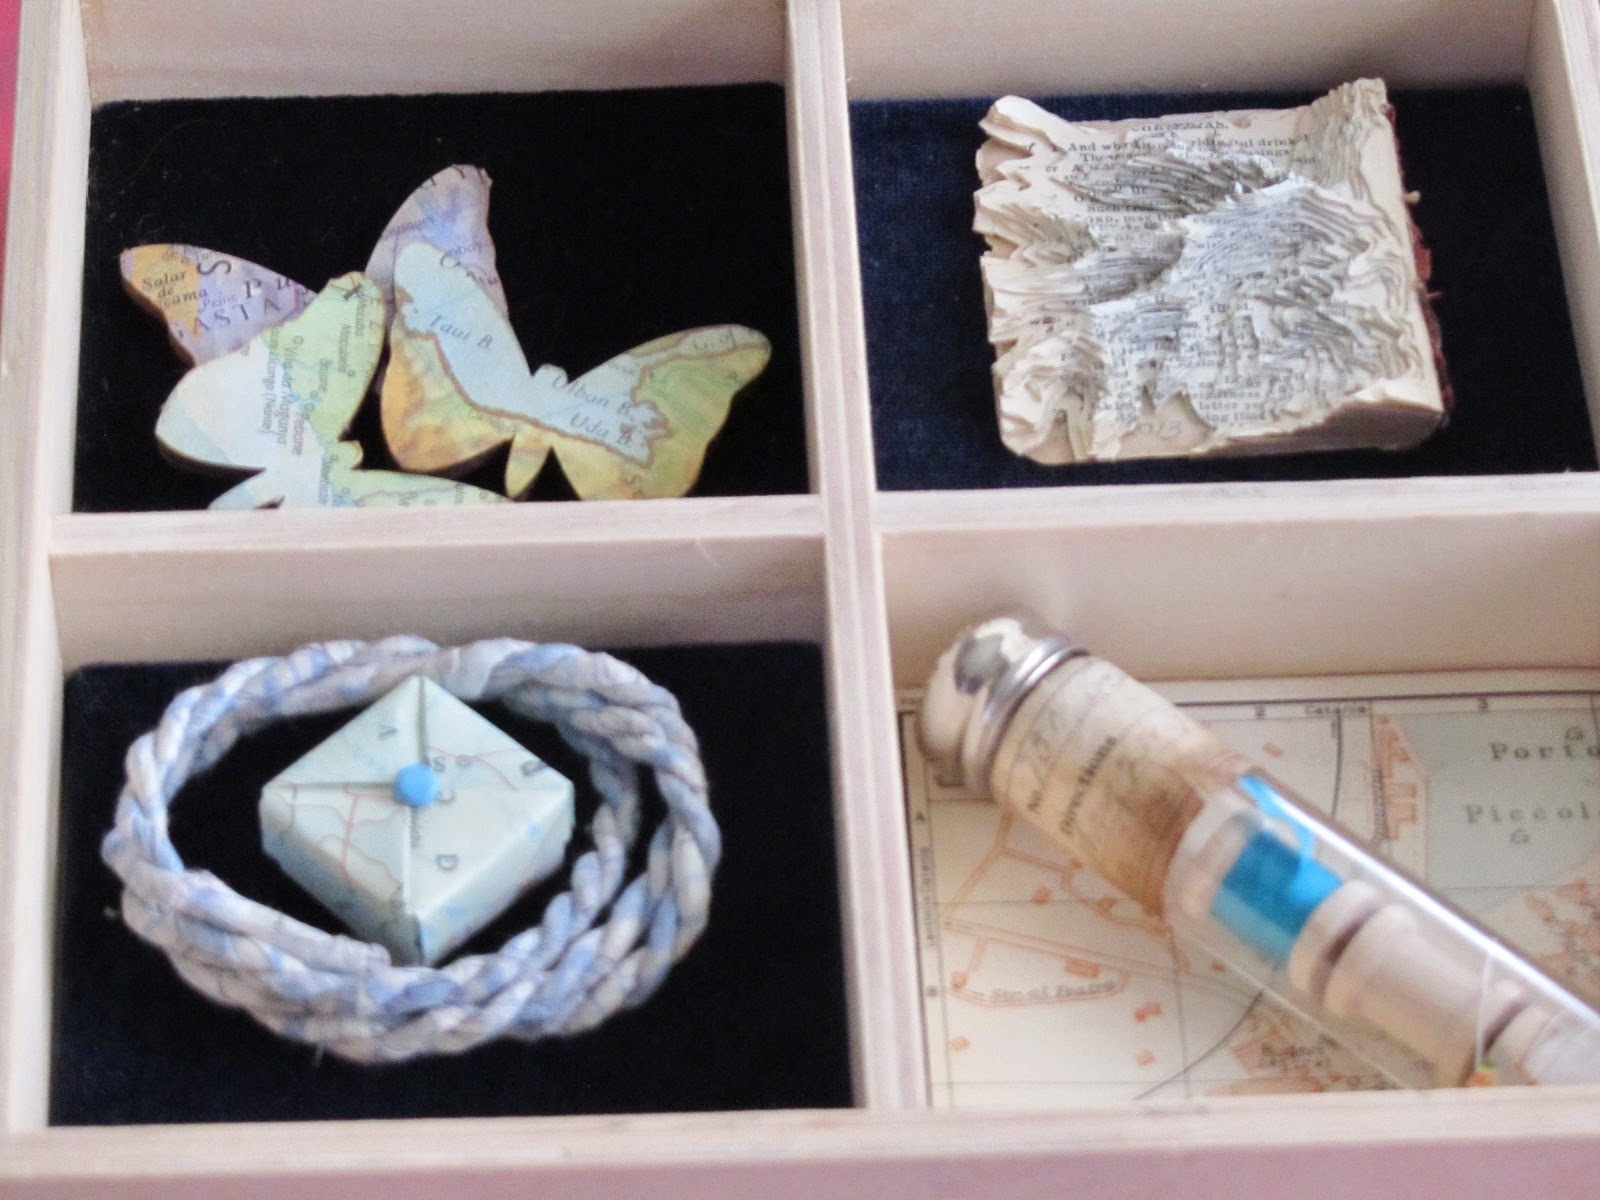
I made this box of treats for my mom. The very tiny carved book is a river flow in reverse. I also made the very tiny box in the lower right.

Here is another boxed art piece with the reverse of a mountain carved into a small German book. I love the way the beach rock mimics the shape of the topographic book.


This is my most recent carved book. It is an old german book that I carved into a table mountain. I think the rock in the center perfectly matches the antique marbled paper revealed once the pages are carved away.

Wednesday, March 26, 2014

Wednesday Post #4: Woven Paper Structures

I have created a video to show you how to make beautiful woven paper creations. I am also sharing photographs of several projects I have made using this versatile technique. I hope you give it a try too.
Thanks for stopping by.

~Gina


 These first two images are woven paper that I then joined at the end to form a circular form. 


This is a recent project that uses Graphic 45 papers and vintage gloves to make a book.


Watch the video below to learn how to make woven paper.

Wednesday, March 19, 2014

Wednesday Post #3: My Map Art

Today I would like to share with you some of the map art I made about a year ago. I was obsessed with vintage maps and atlases; the kind you can pick up at local estate sales or second hand book stores for a few dollars. I was fascinated by the colors, lines and differences between maps from 30 or 40 years ago and now. I cut folded, layered, and reshaped them to fit the projects I wanted to create. I hope you enjoy this little tour of my map art. Thanks for stopping by.

~Gina

 "Edna's Travels" is an artist's book made of envelopes and letters written by Edna Rudolph, a teacher who spent her summers traveling the world and writing home about it. Each letter is housed in an atlas envelope of the country she was visiting at the time. The envelopes are folded using Hedi Kyle's method and sewn into the spine of the book. This book was shown at Front Porch Gallery in Carlsbad, CA and the Carmel Valley Library in CA.

"Red Routes" is an origami folded single sheet of orange paper that forms pockets to hold the twist folded map squares. I tried to find map sections with red lines that moved around the piece.

 "Crossover" uses several techniques, including folded vellum with text cut and carefully inserted in each pleat in the shape of a river with an accompanying map of the same river with punched holes showing the relative width of the river as it meanders along. This piece traveled around the country last year as part of San Diego Book Arts member shows at Cerritos Library in Orange County, CA and the Graficas Gallery on Nantucket.

"Meeting Creek is a river in Kentucky that has a nice shape. It was cut into the pleated vellum and a vellum river is overlaid on the map of Kentucky. This tin box used to hold watercolors.

 I worked on a series of cut maps in which I carefully cut out everything but the roads on maps and then inserted them in bottles. I like the shadows the paper casts in the light that shines through them. The one above is called "Nesting" and the two below are "Network I and II." The maps came from an old travel guide on England and each map is from a different city.


I created this map house and origami inside tea bags for a friend who kindly gave me the tea in the first place. The lovely triangular mesh tea bags just begged to be used for something creative.


Finally, here is a close up of "Entanglement." This is a single sheet of map paper folded accordion style, with cut windows that are then folded into cranes and their heads are entwined. I invented this crane creation by combining several different techniques. It was shown at CODEX 2013 in Richmond, CA.

Thursday, March 13, 2014

Graphic 45 Design Team 2014 Audition

This is a very special post. Today I am submitting work for the Graphic 45 Design Team 2014 Audition. I only recently discovered Graphic 45 papers, but have worked very hard in the last few weeks to create six projects for consideration. Thank you for this opportunity and for creating such lovely papers to work with.


 1. Tower of Treats: For this project I used 6 x 6 Couture and Botanical Tea paper pads. I wanted to use the striped papers because I like the way they look zigzagging up and down the sides of the boxes.


As you can see in the picture above each box holds a surprise; vellum envelopes with punched butterflies, a Couture bead necklace, Botanical Tea party invitations, and an origami dress box with a mini origami dress inside.


 The design for these boxes came from Winson Chan, but I modified his original design to make the box sizes go from large to small. Note how the base of one box is locked into the lid of the one below. This makes the construction very sturdy.


2. Bird Song Wall Hanging: I created origami pockets to hold squares cut from the 8 x 8 Bird Song paper. They fold up accordion style and fit into the 2 x 2 box that I made. 


 3. Pinwheel Alice: I invented this paper form and it reminded me of four stages where scenes can be creared. The Halloween in Wonderland papers had a perfect set of images that were just right to be cut out and placed on each stage.


4. Steampunk Accordion: This book is made with Graphic 45 Core'dinations card stock and Steampunk Debutante papers. It is held together using a slit and curled tab system. I embellished some of the images with vintage watch faces and gears. I like the contrast between the beautiful images and the industrial watch parts. 


5. Three Flexigons: A flexigon is a paper toy that can be turned several times to reveal different images (see video for demonstration of how a flexigon works). I created two different square ones using Steampunk Debutante and Steampunk Spells as embellishments. I also discovered to my delight that Graphic 45 makes a few papers that have images and their mirrors. That allowed me to make the Hexaflexigon with fairies from the Once Upon a Springtime collection, dragonflies from Botanicabella and rabbits from Halloween in Wonderland. The technique creates surprising shapes and background images when carefully cut.


6. Finally, Three Glove Books: I saw an artist book once that had red leather gloves as the covers and decided to make my own. I started collecting vintage ladies gloves and created a way to bind them into books without damaging the gloves. They slip onto custom cut chipboard that has a book cloth spine. 


6a. These pink gloves cried out to be paired with Botanical Tea papers and I created a woven paper design that looks lovely when open and folds flat for easy storage.


6b. The beaded black gloves were just the thing for a Couture book. The pages can hold vintage pictures, scraps of lace or whatever you can imagine.


6c. Long white leather gloves should be reserved for weddings and this pair serves as a guest album. I embellished the pages with cutouts from A Ladies Diary. It is ready for any fashionable wedding.