Thursday, September 18, 2014

I spent a hot weekend here in San Diego trying to figure out how to fold an expandable file book based on Hedi Kyle's Blizzard Fold. It took some trial and error to get things just right. I think in the end I had to make 5 or 6 models to get a book that would hold ATC size inserts (3.5 x 2.5 inch cards). The book can be modified to make it taller, squarer, wider, etc. depending on the size of the piece of paper you begin with and how much you fold in the long edges.

Below is a series of pictures I took while folding the 3.75 x 2.5 inch model for my ATC's. Enjoy and please feel free to leave comments. I like to hear from you.

~Gina


1. Cut paper to 7.5 x 20 inches. Fold both long edges in 1/4 of the width (1 7/8 inch). I used a long clear ruler to score and fold these lines since the paper is grained short (the grain of the paper is parallel to the 7.5 inch width of the paper). Once both edges of the paper are folded unfold them in preparation for step 2.


2. Accordion fold the paper into 8 equal sections. The best way to fold paper is to fold it in half, unfold, fold the two edges into the center fold, unfold and finally fold each of these 4 sections in half. Do them one at the time and do not stack the folds as this leads to the paper twisting. Only fold one layer at a time for best results.
 

3. Fold up all of the accordion folds. Your paper should look like this. The first page should open away from you.


4. This step is where we diverge from the normal Hedi Kyle Blizzard Fold. Follow the steps in the handwritten directions above numbered 1-3. Hopefully, the pictures and lines make sense. When you are done your model should look like the picture above.


5. Open the page and this is how the model looks. 


6. Now we need to fold the next section the same way as above, but with two sides. This time we have a bit of help from the previous fold. The angle of the triangle is established by the crease made in the last step. This will help you line up the diagonal that meets in the center of the folded page. 


7. This picture shows you what the model looks like once both top and bottom triangles have been folded on one side.


8. Here is the model with both sides folded down and in.


9. Open the next page and repeat the process two more times.


10. Here is the last page ready to have its triangle flaps folded.


11. This is what the back page looks like with the triangle flaps folded in. Notice the overall shape of the model now.


12. This is the top front view of the model.


13. Compare this picture to the one above. See how I have folded in the triangles that stuck out above?


14. Here is what the back side of the model looks like. I kind of like this look too. You could tuck item in here if they were flat enough. In the final book this side will get hidden, though.


15. This is the completed model from the side. The triangular pieces in between each accordion fold give this book its expandability. You can put bulky objects in each section. 


16. To finish the book simply attach a cover with narrow spine and you are ready to go. The cover for this size book measures 4 x 5.5 inches.  I attached it with glue and double sided tape, but you can use whatever you like.

Tuesday, July 29, 2014

Wednesday Post #8: Circle Segment Sculpture

I have been working for a few weeks on a project and taking pictures of the art in progress. I thought you might like to see how a piece of art goes from concept to completion. I took a series of pictures throughout the process and they appear below with descriptions. You will see that I changed directions along the way. I often begin a piece of art with one idea in mind and as I work other ideas surface and demand to be given a chance. I like the end result of this project and hope you do too. I still need to come up with a name so if you have any suggestions please leave them in the comments section. Thanks for stopping by.

~Gina

 The idea for this piece came from a segment I saw on Antiques Roadshow some time ago. This guy brought a round table in that was made of six curved parts. It turned out that each part had its own set of legs and could, therefore be deconstructed and rearranged into different configurations. I loved it instantly and drew a sketch to save for later. I made my circle and segments from foam core using a circle cutter to make the cuts.

 At first I planned to make this with a top and bottom piece suspended with wooden dowels. I made a couple of segments to try out the concept and played with different origami objects to place inside.


Here are some of the parts and tools I used at this stage to create the interior space. After I lined up the two segments I didn't like the open feeling of the piece, but wanted it to have thickness. I decided to undo this work but save the cut pieces. I ended up cutting out 3 circles and segmenting them to make the final circle form.

 This is a picture of the open space design with an origami butterfly suspended in the middle on a pin. I ended up changing the concept entirely.

Here is one segment wrapped in Japanese paper the meld the three pieces of foam core together. I ended up painting the sides the match the colors of the top. See the next few pictures.

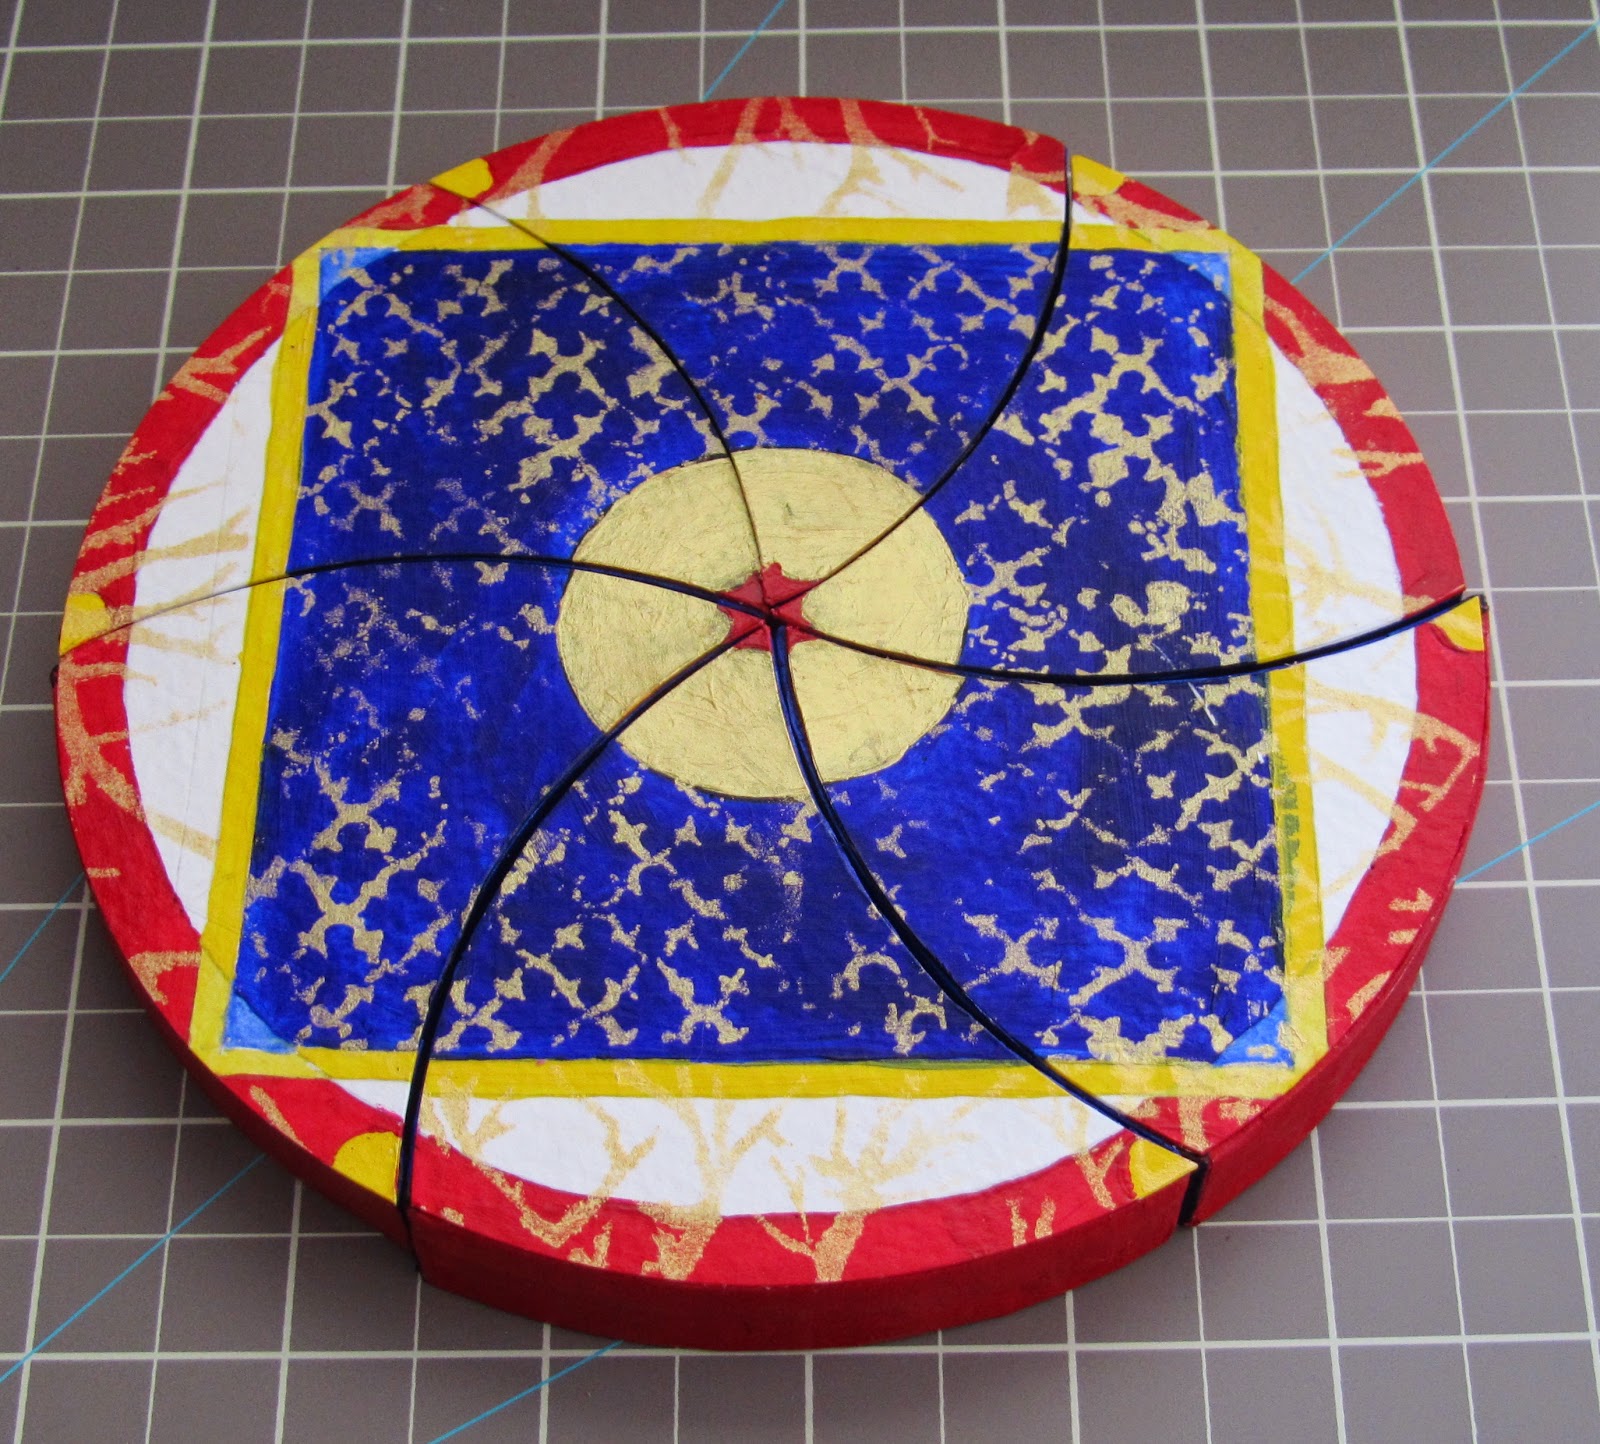
 This painting for the top of the circle started out as just a sample. I ended up liking it so much that I used it on the final work. I love the way the gold and blue work together. I used the circle stencil to mask the center, which was originally black, so that I could paint it gold to match the gold stencil work.

 My favorite configuration for these segments is the one shown above. before I glued the cut paper wedges to the foam core I played around with their arrangement once the circle design was broken up. I was surprised that the design worked so well after being broken apart and reformed.

When I was satisfied with the look of the design, I glued the watercolor paper design onto the six segments being careful to align each piece with the edges of the foam core base.

Then I rearranged the segments into my favorite shape and turned the pieces over. 

I decided to use a piece of Japanese paper (the same kind I used for the sides of each segment) with writing on it for the back. I laid a sheet of paper beneath this shape and traced each segment in pencil. Then I used a divider with pencil lead to trace a 1/8th inch indent. I cut out the paper and glued it down.


This is how the back looks when the piece is returned to its circle form. I still prefer the shape above, but this looks good too. What do you think?

Wednesday, June 4, 2014

Wednesday Post #7: My Mini Album Structure

It has been a while since my last post. Somehow I missed May altogether. I will work on posting more regularly now that summer is almost here. Today I have pictures of my latest creation, a mini album. I invented the page structure and sewed the spine so that the pages lay flat when open. I used Graphic 45 Bird Song 8 x 8 papers to decorate the pages and I used Japanese handmade paper and black book cloth for the covers. The best thing about the page structure is that the folding process creates pockets and corner tabs as you will see in the pictures. It also creates a between-the-page pocket for a large photo mat. I folded the pages two ways to get side and top pockets, but you could make them all the same way. I will post a tutorial for making the pages on You Tube as soon as my editor (son) has some free time to do his technical magic. In the meantime, enjoy the pictures and descriptions below.

Thanks for visiting.

Gina

 Picture one shows the book with the pages sewn to the accordion folded grey paper.


Here are all of the pages laid out before they were decorated with G45 paper.


A side view of the pages and accordion fold binding.


Two page spread with side and top/bottom pockets.


Two page spread with corner tabs showing.


Good view of sewn accordion fold spine.


Finished book cover. I used Japanese paper for this along with black book cloth. The grey spine paper has a 3 inch end that I glued onto the book cover.


Inside page spread with G45 Bird Song papers decorating the pages. Notice the tabs at the top and sides of the pages. These are the photo mats.


Here is another two page spread showing floral patterns. I just love the florals in this set.


Here I have pulled out the photo mats so you can see that they match the pages and pull out from the top or the side depending on how I folded the pages.


Another two page spread showing off the greens from this collection.


Another page spread.


Here you can see that sometimes the pockets are both the same (in this case from the top of the book).


More photographs of the pages decorated. I love the way the papers work together.

This is a photograph of the binding sewn to make the book sturdy. I did sew the binding loosely so that when photographs are inserted they won't make the open end of the book bulge. I used scrap book board as spacers when I was sewing to keep the spacing between pages consistent.

Wednesday, April 16, 2014

Wednesday Post #6:Teaching the Modified Blizzard Fold at SDBA

Good day and welcome to my sixth post on Wednesday. Today I would like to share some pictures from a recent workshop I taught. It was lots of fun teaching a group of San Diego Book Arts members how to make a Hedi Kyle Blizzard Fold book. We then changed some of the folds to make a box structure that I developed several years ago. I call it the Modified Blizzard Fold. I have since discovered another modification that you are welcome to try as well. One of these days I will make a video of the folding process so stay tuned for that.

Please check out the pictures Joan Crone took of the group as we folded our books. It was a pleasure to teach and learn from everyone. Enjoy!

~Gina

 Here are some of the supplies we used to color and decorate our paper before folding.

 Yvonne is folding in the foreground while I sit back and explain the next fold.

 Sara and Sibyl are busy popping open their boxes.

 Britta inspects her work.

 Sara makes a box.

 Showing Pam how to get the box to "pop."

 Helping Kathy get the box to close properly.

 Pam and Sari look at the interaction of structure and design.

 Sibyl inspects her work.

Sara with her model fully open.